Getting started
Account and organisation
Every customer is a separate organisation: content, credits, users and settings always belong to one organisation and are isolated from others. Your access is created by your organisation; your role in it determines which areas and actions are available to you. A user can be a member of several organisations and hold different roles in each.
Signing in
You sign in with e-mail and password or with an API key (format llp-...). You find your API key after login under "API keys". If you have trouble signing in, contact your organisation's administrator.
Load the plugin and create your first content
Get your first presentation into Moodle in a few minutes:
- Install the plugin (once, by the Moodle admin): Site administration → Plugins → Install plugins → upload ZIP. Then enter the API URL and API key (from lern.link). Details under "Integrations".
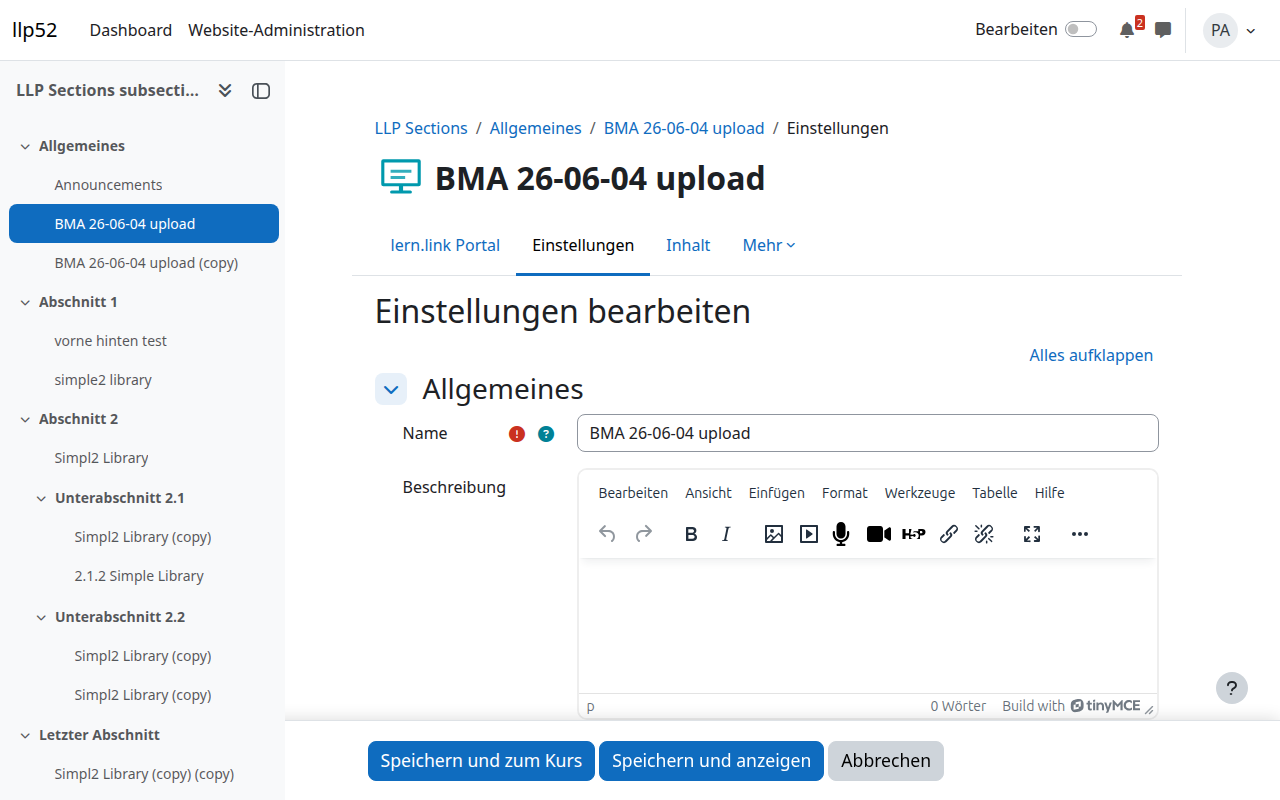
- Create an activity: in the course, turn on edit mode → "+ Add an activity" → "lern.link Portal" → Add.
- Upload the PPTX: in the settings form under "Content", upload the file (or pick from the platform) → "Save and return to course". Conversion runs in the background.
- Done: learners open the activity and see the slides right in the browser. Progress and course completion are tracked automatically.
Alternatively, upload content directly in the portal under "Content" and then embed it in Moodle, WordPress or another LMS (→ "Player & LMS").
Key terms
- Content — an uploaded and converted presentation (from PPTX, PDF, SCORM or H5P). The basis for playback, editing and AI enrichment.
- Organisation — your tenant in the portal; groups content, users, credits and settings.
- Player — the web playback of a content item, embedded in Moodle, WordPress or a SCORM LMS.
- Credits — the billing unit; consumed by conversion, AI functions, storage and, depending on the plan, slide views (→ "Credits & billing").
- Role — bundles permissions (e.g. administrator, editor, viewer) and controls what you can see and do.
Tour and help
On first login a short tour walks you through the main areas. You can cancel it at any time and restart it via the help icon (?) in the top right. There you also find context help for the current page and the help assistant, which answers questions based on the help articles.
The portal areas
The portal menu is organised into these areas — this documentation follows the same structure:
- Home — dashboard with an overview; tickets with feedback on your content.
- Content — uploading, importing, sharing and managing your learning content (→ "Content").
- Credits — balance, usage, top-up and billing address (→ "Credits & billing").
- Administration — organisations, users, roles, API keys, consumption report and pricing (→ "Administration").
- Integrations — translation, AI providers, payment providers, e-mail (→ "Integrations").
- Settings — organisation-wide defaults (→ "Administration").